Neutral Safety Switch for Manual Transmission: A Comprehensive Guide
Understanding this crucial component ensures vehicle safety, preventing accidental starts and offering insights into transmission functionality, especially with manual gearboxes.
What is a Neutral Safety Switch?
The neutral safety switch is a vital, often-overlooked component within a vehicle’s starting system. Its primary function is to prevent the engine from starting unless the transmission is in a neutral or park position – a crucial safety measure. While commonly associated with automatic transmissions, manual transmissions utilize a similar device, frequently termed a clutch safety switch.
This switch acts as a gatekeeper, ensuring the vehicle won’t unexpectedly lurch forward or backward during ignition. It achieves this by completing the electrical circuit to the starter solenoid only when the correct conditions are met – either neutral/park for automatics, or the clutch pedal being fully depressed for manuals. Essentially, it’s a safeguard against accidental vehicle movement, protecting both the driver and surroundings.
Functionality in Automatic vs. Manual Transmissions
The core principle of a neutral safety switch remains consistent across both automatic and manual transmissions: preventing unintended vehicle movement during starting. However, the implementation differs significantly. In automatics, the switch directly monitors the transmission’s position – Park or Neutral – completing the starter circuit only when confirmed.
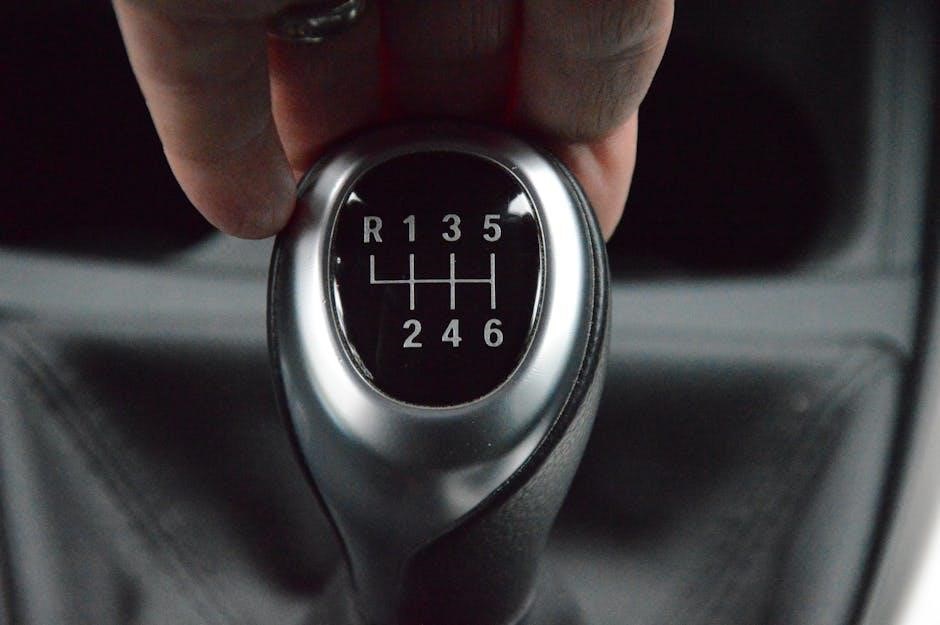
Manual transmissions, lacking a defined “Park” position, employ a clutch safety switch. This switch is linked to the clutch pedal; it verifies the pedal is fully depressed, indicating the transmission is disengaged from the engine. Only then does it allow the starter to engage. Both systems serve the same safety purpose, but one relies on gear selection, while the other relies on clutch disengagement.
The Role of the Clutch Safety Switch
The clutch safety switch, integral to manual transmission vehicles, acts as a gatekeeper for the starter motor. Its primary function is to ensure the engine won’t start unless the clutch pedal is fully depressed. This prevents the car from lurching forward or backward during ignition, a crucial safety feature.
Positioned near the clutch linkage, the switch completes the electrical circuit to the starter solenoid only when the clutch is engaged. It’s a fail-safe mechanism, overriding the ignition switch if the clutch isn’t pressed. Essentially, it demands driver intent – a deliberate disengagement of the transmission – before allowing the engine to crank, safeguarding against accidental movements.
Why Manual Transmissions Need a Safety Switch
Unlike automatic transmissions with defined Park and Neutral positions, manual transmissions rely on the driver to disengage the engine from the drivetrain. A safety switch fulfills this critical role, preventing unintended vehicle movement during startup. Without it, simply turning the key could cause the car to jump forward or backward if a gear is selected.
This feature is paramount for safety, especially on inclines. The clutch safety switch ensures the driver consciously disengages the transmission before starting, mitigating the risk of a runaway vehicle. It’s a fundamental component, protecting both the driver and surrounding individuals from potential accidents caused by an unexpected engine engagement.
Symptoms of a Failing Clutch Safety Switch
A failing clutch safety switch manifests in several frustrating ways. Difficulty starting the engine is a primary indicator; the starter may engage intermittently or not at all, even with the clutch fully depressed. You might experience an engine cranks but doesn’t start scenario, where the starter turns, but the engine refuses to fire up.
Intermittent starting issues are also common – the car starts sometimes, but fails other times, often seemingly at random. These symptoms can be misleading, mimicking other starting problems. Consistent troubleshooting is key. Ignoring these signs can lead to being stranded, so prompt diagnosis and repair are crucial for maintaining vehicle reliability and safety.
Difficulty Starting the Engine
Difficulty starting the engine is often the first sign of a failing clutch safety switch in a manual transmission vehicle. The starter might crank slowly, or require multiple attempts to engage. This happens because the switch isn’t reliably signaling the system that the clutch is depressed, preventing the starter from receiving power consistently.


Sometimes, the engine won’t start at all, even with a fully depressed clutch. This can be particularly frustrating, leading to misdiagnosis of other potential issues. The problem isn’t the battery or starter itself, but the communication breakdown caused by the faulty switch. A careful inspection and testing of the switch are essential to confirm this diagnosis.
Engine Cranks But Doesn’t Start
Experiencing an engine that cranks robustly but fails to ignite is a common symptom of a malfunctioning clutch safety switch in manual transmission cars. The starter motor is receiving power, indicated by the cranking sound, but the engine control unit (ECU) isn’t allowing the fuel system or ignition to activate. This is a direct result of the switch not confirming clutch pedal depression.
Essentially, the car thinks it’s not in a safe state to start, even though the mechanical action of cranking is occurring. This scenario often leads to confusion, as it mimics other starting problems. Thoroughly testing the switch with a multimeter is crucial to pinpoint this specific issue and avoid unnecessary repairs.
Intermittent Starting Issues
Dealing with a vehicle that starts sometimes, but not others, can be incredibly frustrating, and a failing clutch safety switch is a frequent culprit in manual transmission systems. The issue arises from inconsistent contact within the switch itself, or corrosion on its electrical connections. One moment the switch signals proper clutch engagement, the next it doesn’t.
This sporadic behavior makes diagnosis trickier. The engine might start normally on one attempt, then require several tries, or refuse to start altogether. Wiggling the clutch pedal during a failed start attempt can sometimes temporarily restore contact, offering a clue. Consistent, intermittent failures strongly suggest a switch problem needing immediate attention.
Common Causes of Clutch Safety Switch Failure
Several factors contribute to the decline of a clutch safety switch in a manual transmission vehicle. Wear and tear is a primary cause; repeated activation gradually degrades the internal components, leading to inconsistent signals. Wiring problems, including corrosion, frayed wires, or loose connections, disrupt the electrical circuit, preventing proper function.
Adjustment issues also play a role. If the switch isn’t correctly aligned with the clutch linkage, it may not fully engage or disengage, causing intermittent failures. Environmental factors, like moisture and road salt, accelerate corrosion. Ultimately, a combination of these elements often leads to complete switch failure, necessitating replacement for safe vehicle operation.
Wear and Tear
Consistent use inevitably leads to wear and tear on the clutch safety switch. Each clutch pedal press mechanically stresses the switch’s internal contacts and moving parts. Over time, this repeated action causes gradual degradation, diminishing the switch’s ability to reliably transmit signals. The plastic components within the switch can become brittle, and metal contacts can corrode or pit.
This progressive deterioration doesn’t happen suddenly; it’s a slow process. However, it ultimately results in inconsistent readings or complete failure. The frequency of clutch use directly impacts the rate of wear, with frequent shifting accelerating the decline. Regular inspection can help identify early signs of wear before a complete failure occurs, ensuring continued vehicle safety.
Wiring Problems
Corrosion, damage from heat, or physical stress can compromise the wiring connected to the clutch safety switch. These issues disrupt the electrical circuit, preventing the switch from communicating effectively with the vehicle’s starting system. Exposed wires are vulnerable to environmental factors, accelerating corrosion and leading to intermittent or complete signal loss.
Loose connections are also a common culprit, particularly in areas subject to vibration. A frayed or broken wire can cause a short circuit or open circuit, both of which will prevent the engine from starting. Thoroughly inspecting the wiring harness for any signs of damage, and ensuring all connections are secure, is crucial for diagnosing starting problems related to the switch.
Adjustment Issues
Proper alignment and adjustment of the clutch safety switch are vital for its correct operation. If the switch isn’t positioned accurately, it may not fully engage when the clutch pedal is depressed, failing to signal the system that the transmission is in a neutral or disengaged state. This misalignment can occur due to previous repairs, accidental bumps, or natural settling over time.
Incorrect positioning prevents the switch from completing the circuit, hindering the starter motor. Careful adjustment, following the vehicle manufacturer’s specifications, is often necessary to ensure the switch activates reliably. Sometimes, slight adjustments to the switch’s mounting bracket or the clutch pedal linkage are all that’s needed to restore functionality.

Locating the Clutch Safety Switch
Finding the clutch safety switch on a manual transmission vehicle typically involves looking near the clutch pedal assembly. Unlike automatic transmissions where the switch is near the gear selector, on manuals, it’s usually integrated into the clutch linkage. Examine the area where the clutch pedal connects to the transmission; it’s often mounted on the clutch master cylinder or directly onto the pedal’s support bracket.

Visually inspect for a small electrical connector and a switch activated by the clutch pedal’s movement. The switch may be somewhat hidden, requiring a flashlight and potentially removing some plastic trim panels for better access. Referencing a vehicle-specific repair manual will provide the precise location for your particular make and model, ensuring accurate identification.
Testing the Clutch Safety Switch
Accurate testing of the clutch safety switch is vital for diagnosing starting problems. Using a multimeter is the most reliable method. With the ignition off, disconnect the switch’s electrical connector. Set the multimeter to measure resistance (Ohms). Depress the clutch pedal fully; the resistance should change, indicating the switch is opening and closing the circuit.
Additionally, a visual inspection of the wiring is crucial. Check for damaged wires, loose connections, or corrosion. Ensure the connector is clean and securely fastened. If the multimeter shows no change in resistance or the wiring is faulty, the switch likely needs replacement. Always consult your vehicle’s repair manual for specific testing procedures and acceptable resistance values.
Using a Multimeter
To effectively test the clutch safety switch with a multimeter, begin by locating the switch and disconnecting its electrical connector. Set your multimeter to the resistance (Ohms) setting. Probe the switch’s terminals with the multimeter leads. With the clutch pedal released, you should read a near-zero resistance, indicating a closed circuit.
Then, fully depress the clutch pedal. The multimeter reading should change to infinite resistance (open circuit), confirming the switch is functioning correctly. If no change is observed, or the initial reading is infinite, the switch is likely faulty. Remember to consult your vehicle’s service manual for specific resistance values and testing procedures for your particular model.
Visual Inspection of Wiring
Begin by carefully examining the wiring harness connected to the clutch safety switch. Look for any obvious signs of damage, such as frayed wires, cracked insulation, or corrosion at the connectors. Pay close attention to areas where the harness bends or rubs against the vehicle’s chassis, as these are common points of wear.
Ensure the connector is securely fastened to the switch and free from debris. Check for any bent or broken pins within the connector. A visual inspection can often reveal simple issues like loose connections or damaged wires that can cause intermittent starting problems. Repair or replace any damaged wiring before proceeding with further testing.
Replacing the Clutch Safety Switch: A Step-by-Step Guide
First, disconnect the negative battery terminal for safety. Locate the clutch safety switch (often near the clutch pedal linkage). Disconnect the electrical connector from the old switch. Note the switch’s orientation before removal for correct installation.
Next, carefully remove the old switch, typically held in place by a clip or bolt. Install the new switch, ensuring it’s securely mounted and oriented correctly. Reconnect the electrical connector, verifying a snug fit. Finally, reconnect the negative battery terminal and test the starting system. Confirm the engine only starts with the clutch depressed.
Safety Precautions During Replacement
Prioritize disconnecting the negative battery terminal to prevent accidental shorts and electrical shock. Work in a well-lit and ventilated area, wearing appropriate safety glasses to protect your eyes. Be mindful of the clutch linkage and surrounding components, avoiding any forceful movements that could cause injury.
Ensure the vehicle is parked on a level surface with the parking brake firmly engaged. If lifting the vehicle, use jack stands for secure support – never rely solely on a jack. Handle the new switch with care, avoiding damage to its internal components. Properly dispose of the old switch according to local regulations.
Specific OEM Part Numbers (Example: GJ6A-66-49YA)
Identifying the correct Original Equipment Manufacturer (OEM) part number is crucial for a proper replacement. For certain applications, like some Mazda vehicles, the clutch safety switch part number is GJ6A-66-49YA. However, this number varies significantly depending on the vehicle’s make, model, and year.
Always consult your vehicle’s repair manual or a trusted parts catalog to confirm the exact OEM part number for your specific car. Using the wrong switch can lead to compatibility issues and potentially compromise the safety system. Cross-referencing with your VIN (Vehicle Identification Number) is highly recommended for accurate identification.
Preventative Maintenance for the Clutch Safety Switch
Regular inspection of the clutch safety switch and its associated wiring is key to preventing unexpected failures. Periodically check the switch for physical damage, corrosion, or loose connections. Ensure the clutch pedal moves freely and the switch actuates smoothly with pedal travel.
Consider applying a dielectric grease to the electrical connections to prevent corrosion and maintain a good connection. Avoid excessive force when adjusting the switch, as this can damage the internal components. A proactive approach, including these simple checks during routine maintenance, can significantly extend the switch’s lifespan and ensure continued safe operation.
Troubleshooting Additional Starting Problems
If replacing the clutch safety switch doesn’t resolve the starting issue, investigate other potential causes. Check the battery’s charge and connections, ensuring they are clean and tight. Examine the starter motor and solenoid for proper function, listening for clicking sounds during ignition attempts.
Inspect the ignition switch itself, as a faulty switch can prevent power from reaching the starter. Don’t overlook the fuel system; a lack of fuel pressure can also cause a no-start condition. Finally, verify the engine isn’t experiencing compression issues. A systematic approach, eliminating possibilities one by one, is crucial for accurate diagnosis.
Leave a Reply
You must be logged in to post a comment.