
Aroma Rice Cooker 3-Cup: A Comprehensive Guide
Navigating consistent rice preparation can be challenging; however, Aroma’s 3-cup cookers eliminate variables, offering reliably fluffy results regardless of kitchen conditions or user experience.
Aroma 3-cup rice cookers represent a convenient and accessible entry point into the world of automated rice cooking. These compact appliances are specifically designed for individuals or smaller households, offering a practical solution for consistently preparing perfectly cooked rice without the guesswork often associated with stovetop methods. Unlike traditional cooking, Aroma cookers mitigate external factors like burner heat levels, pot insulation, lid seals, and even kitchen humidity, ensuring reliable results every time.
They are particularly appealing to those new to rice cooking or seeking a simplified approach to meal preparation. The 3-cup capacity strikes a balance between functionality and space-saving design, making them ideal for apartments, dorm rooms, or as a secondary cooking appliance. Beyond basic white rice, many models offer versatility for cooking various grains, steaming vegetables, and even preparing oatmeal, expanding their utility in the kitchen.
Why Choose a 3-Cup Rice Cooker?
Opting for a 3-cup rice cooker presents several compelling advantages, particularly for smaller households or individuals. Its compact size saves valuable counter space, a significant benefit in smaller kitchens. The 3-cup capacity is perfectly portioned, minimizing waste and aligning with typical serving sizes for one to two people. Unlike stovetop methods, Aroma cookers eliminate the constant monitoring and adjustment needed to achieve consistently fluffy rice.
This “set it and forget it” functionality frees up your time for other tasks. Furthermore, these cookers excel at removing the variability inherent in traditional rice preparation – burner inconsistencies, pot insulation, and even humidity no longer impact the final result. This leads to predictable, delicious rice every time, making it a reliable staple for quick and easy meals.
Understanding the Parts of Your Aroma 3-Cup Cooker
Familiarizing yourself with the components of your Aroma 3-cup rice cooker is crucial for optimal operation. The primary elements include the outer housing, providing structural support and insulation. Inside, you’ll find the removable cooking pot, typically non-stick for easy cleaning, where the rice cooks. The heating plate, located at the base, evenly distributes heat.
The control panel, usually featuring simple buttons, manages cooking cycles. A steam vent releases excess moisture during cooking. The lid, often with a locking mechanism, traps steam for efficient cooking. Finally, the measuring cup and spatula, included accessories, ensure accurate rice-to-water ratios and prevent scratching the cooking pot. Understanding each part’s function will enhance your cooking experience.

Getting Started: Initial Setup & First Use
Before enjoying perfectly cooked rice, proper setup is essential. Unbox your Aroma cooker, remove all packaging, and prepare for a simple, satisfying culinary journey.
Washing Before First Use
Prior to your inaugural cooking experience with your Aroma 3-Cup Rice Cooker, a thorough cleaning is paramount. This initial wash removes any residual manufacturing dust or particles that may affect the taste of your first batch of rice. Begin by carefully removing the inner pot and steam vent. Wash both components with warm, soapy water, ensuring you use a non-abrasive sponge or cloth to avoid scratching the non-stick coating of the inner pot.
Rinse both thoroughly, paying close attention to the steam vent to remove any potential obstructions. Wipe down the exterior of the rice cooker with a damp cloth. It’s crucial to avoid immersing the main unit in water. After washing, allow all parts to air dry completely before assembling and proceeding with your first use. This simple step contributes significantly to the longevity and performance of your new Aroma rice cooker, guaranteeing delicious results from the very beginning.
Understanding the Control Panel
The Aroma 3-Cup Rice Cooker boasts a user-friendly control panel designed for simplicity and convenience. Typically, you’ll find a single, large “Cook/Warm” button. Pressing this button initiates the cooking cycle; the cooker automatically switches to “Warm” mode once cooking is complete. Some models feature additional buttons for specialized functions like “Steam” or pre-programmed settings for different rice types.
Indicator lights clearly display the cooker’s current status. A “Cook” light illuminates during the cooking process, while a “Warm” light indicates the rice is being kept warm. Familiarize yourself with these lights to monitor the cooking progress. The panel is intentionally streamlined, minimizing complexity and ensuring effortless operation. Refer to your specific model’s instruction manual for detailed explanations of any additional features or buttons present on your control panel.
Water Level Measurements for 3-Cup Capacity
Accurate water measurement is crucial for perfectly cooked rice in your Aroma 3-Cup Cooker. The inner pot features clearly marked water level lines corresponding to the number of cups of rice. For a 3-cup capacity, ensure the water level reaches the “3” line within the pot. Generally, a 1:1 ratio of rice to water is recommended for white rice, but this can vary slightly depending on the rice type.
It’s important to use the provided measuring cup that came with your rice cooker, as standard measuring cups may differ in volume. Always double-check the water level before starting the cooking cycle. Insufficient water will result in undercooked rice, while excessive water can lead to mushy results. Experimenting with minor adjustments may be necessary to achieve your preferred rice texture.
Cooking Rice: Basic Instructions
Effortless rice preparation is achieved by simply adding measured rice and water, closing the lid, and pressing the cook button for consistently delicious results.
Measuring Rice and Water – The Golden Ratio
Achieving perfectly cooked rice hinges on the correct rice-to-water ratio. For Aroma 3-cup cookers, a generally accepted “golden ratio” for white rice is 1 cup of rice to 1.25 cups of water. However, slight adjustments may be needed based on rice type – long grain, medium grain, or short grain – and personal preference.
Using the included measuring cup is crucial for accuracy, as standard kitchen cups vary in volume. The Aroma 3-cup measuring cup is specifically calibrated for optimal performance within the cooker. For best results, rinse the rice thoroughly under cold water until the water runs clear; this removes excess starch and prevents stickiness.
Carefully add the rinsed rice and the measured water to the inner pot. Ensure the water level aligns with the corresponding “3-cup” mark inside the pot. Precise measurement is key to avoiding mushy or undercooked rice, guaranteeing a consistently satisfying outcome every time.
Step-by-Step Cooking Instructions for White Rice
Follow these simple steps for consistently fluffy white rice using your Aroma 3-cup cooker. First, ensure the inner pot is properly seated inside the cooker. After measuring rice and water using the golden ratio (1 cup rice to 1.25 cups water), close the lid securely.
Press the “Cook” button to initiate the cooking cycle. The cooker will automatically switch to “Warm” mode once the rice is fully cooked – typically within 20-30 minutes. Avoid lifting the lid during the cooking process, as this releases steam and disrupts the cooking temperature.
Once switched to “Warm,” let the rice rest for 10 minutes with the lid closed. This allows the steam to redistribute, resulting in even more tender and flavorful rice. Gently fluff the rice with a fork before serving to separate the grains.
Switching to “Warm” Mode
The automatic switch to “Warm” mode is a key feature of your Aroma 3-cup rice cooker, ensuring perfectly cooked rice without constant monitoring. Once the cooking cycle completes, the cooker seamlessly transitions to this mode, maintaining a serving temperature without continuing to cook the rice.
This prevents burning and ensures the rice remains fluffy and palatable for extended periods. The “Warm” mode is ideal for keeping rice ready to serve while you prepare the rest of your meal.
However, it’s important to note that while “Warm” keeps rice at a safe temperature, prolonged warming (over 12 hours) can slightly alter the texture. For optimal results, consume the rice shortly after it switches to “Warm.”
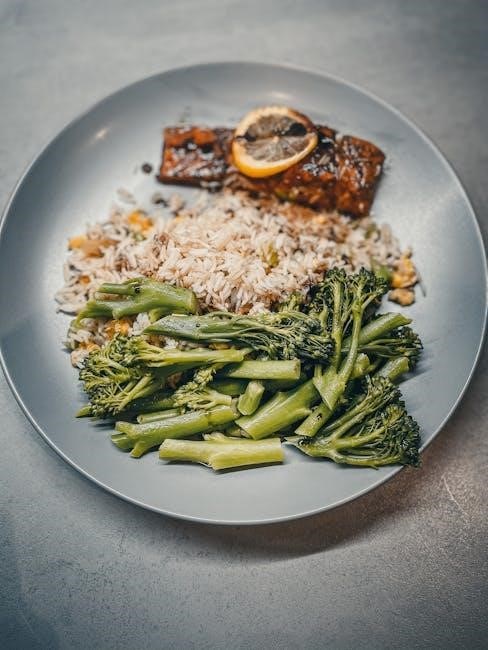
Beyond White Rice: Versatile Cooking Options
Your Aroma 3-cup cooker isn’t limited to white rice; explore diverse recipes like flavorful brown rice, steamed vegetables, and comforting oatmeal creations.
Cooking Brown Rice – Adjusting Water Levels & Time
Brown rice requires a different approach than white rice due to its bran layer, necessitating adjusted water levels and cooking times for optimal texture. Typically, a 1:2.25 ratio of brown rice to water is recommended for Aroma 3-cup cookers – for example, one cup of brown rice to 2.25 cups of water.
Before starting, rinse the brown rice thoroughly under cold water until the water runs clear, removing excess starch. Place the rinsed rice and water into the cooker’s inner pot. Secure the lid and select the “Brown Rice” setting if your model has one. If not, use the standard “White Rice” setting, but be prepared for a slightly longer cooking time.
Cooking time generally ranges from 45 to 55 minutes. Once the cooker switches to the “Warm” setting, let the rice steam, undisturbed, for 10-15 minutes. This final steaming period is crucial for achieving fluffy, evenly cooked brown rice. Fluff with a fork before serving and enjoy!
Steaming Vegetables in Your Aroma Rice Cooker
Your Aroma 3-cup rice cooker isn’t limited to just rice; it’s a surprisingly versatile steamer for various vegetables, offering a healthy and convenient cooking method. To steam, first, add approximately one cup of water to the inner pot. Place the included steaming basket inside, ensuring it sits securely above the water level;
Cut your chosen vegetables into uniform pieces for even cooking. Arrange them in a single layer within the steaming basket, avoiding overcrowding. Secure the lid and press the “Cook” or “White Rice” button to initiate the steaming process.
Steaming time varies depending on the vegetable; broccoli and carrots typically take 10-15 minutes, while softer vegetables like spinach require only 5-7 minutes. Check for desired tenderness and enjoy perfectly steamed vegetables!
Cooking Oatmeal & Porridge
Beyond rice and steamed vegetables, your Aroma 3-cup cooker excels at creating delicious and comforting oatmeal or porridge. Begin by adding water or milk (dairy or non-dairy) to the inner pot – a 2:1 liquid-to-oats ratio is a good starting point, adjusting to your preferred consistency.
For oatmeal, rolled oats work best. Add the oats to the liquid, stir gently, and secure the lid. Press the “Cook” or “White Rice” button. Once the cooker switches to “Warm,” let it sit for 5-10 minutes for thicker porridge.
Experiment with additions like cinnamon, brown sugar, or fruit after cooking. Cleaning is simplified as the non-stick inner pot prevents sticking and burning, ensuring easy enjoyment of a warm breakfast!
Troubleshooting Common Issues
Addressing occasional cooking mishaps is simple; understanding common problems like mushy or hard rice, or burning, ensures consistently perfect results with your Aroma cooker.
Rice is Too Mushy
If your rice consistently turns out mushy, the most likely culprit is an excess of water. Aroma 3-cup cookers, while convenient, require precise water-to-rice ratios for optimal results. Carefully review the measuring guidelines for the type of rice you are cooking – white, brown, or other varieties all demand different water levels.
Begin by slightly reducing the amount of water used in your next cooking cycle. A reduction of just one or two tablespoons can make a significant difference. Ensure you are using the correct cup measurement for both rice and water; inconsistencies here are a frequent cause of mushy rice.
Also, avoid lifting the lid during the cooking process, as this releases steam and disrupts the cooking temperature. Finally, if you’ve added any extra liquids or ingredients, adjust the water level accordingly to compensate. Experimenting with minor adjustments will help you dial in the perfect ratio for your Aroma cooker and achieve consistently fluffy, perfectly cooked rice.
Rice is Underdone/Too Hard
Experiencing hard or underdone rice with your Aroma 3-cup cooker usually indicates insufficient water. Unlike mushy rice, this issue stems from a lack of moisture during the cooking cycle. The first step is to increase the water-to-rice ratio slightly, adding perhaps one or two tablespoons more water than you typically use.
Double-check that you are using accurate measurements for both rice and water. A leveled cup ensures consistency. Also, confirm that your rice has been rinsed properly before cooking; rinsing removes excess starch that can contribute to a harder texture.
Ensure the cooker lid is sealing correctly during operation. A poor seal can allow steam to escape, reducing the available moisture. If the problem persists, try extending the cooking time slightly, allowing the rice more opportunity to absorb the water and achieve a tender, fluffy consistency.
Burned Rice at the Bottom
Discovering burned rice at the bottom of your Aroma 3-cup cooker is a common frustration, typically caused by insufficient water or prolonged cooking on the “Warm” setting. The initial solution is to meticulously measure your rice and water, ensuring adherence to the recommended ratios for your rice type.
Reducing the cooking time slightly can also prevent scorching. Avoid leaving the rice on the “Warm” setting for extended periods after the cooking cycle completes, as this can continue to cook and eventually burn the rice.
A thorough cleaning after each use is crucial to remove any residual starch that can contribute to burning. Consider adding a tiny amount of oil to the inner pot before cooking; this can create a slight barrier and minimize sticking.

Cleaning and Maintenance
Regular cleaning preserves performance and longevity; promptly wash the inner pot and steam vent after each use to prevent starch buildup and ensure optimal function.
Proper Cleaning Procedures
After each use, and once the rice cooker has completely cooled, unplug it from the power outlet. Remove the inner pot, lid, and any other detachable parts like the steam vent. These components are typically non-stick coated, so avoid abrasive cleaners or scouring pads that could damage the surface.
Wash the inner pot, lid, and steam vent with warm, soapy water. A soft sponge or cloth is ideal. Rinse thoroughly to remove all soap residue. For the exterior of the rice cooker base, wipe it down with a damp cloth. Never immerse the base in water, as this could cause electrical damage.
Pay close attention to the area around the heating plate inside the cooker base; gently wipe away any stray rice or debris. Ensure all parts are completely dry before reassembling and storing the rice cooker. Consistent adherence to these procedures will maintain your Aroma cooker’s performance.
Removing Stubborn Starch Build-Up
Over time, even with regular cleaning, a white, chalky starch build-up can accumulate inside the inner pot and on the heating plate. To tackle this, create a solution of equal parts water and white vinegar. Pour this mixture into the inner pot, ensuring it covers the affected areas.
Run a full cooking cycle without rice, allowing the vinegar solution to steam and loosen the starch. After the cycle completes and the cooker has cooled, carefully pour out the vinegar solution and gently scrub the inner pot and heating plate with a soft sponge.
For particularly stubborn build-up, let the vinegar solution sit for a few hours before running the cycle. Rinse thoroughly with clean water to eliminate any lingering vinegar smell. Repeat if necessary, ensuring complete removal of the starch residue for optimal performance.
Dishwasher Safe Parts?
Determining which parts of your Aroma 3-Cup Rice Cooker are dishwasher safe is crucial for convenient cleaning. Generally, the inner pot, steaming basket (if included), and the measuring cup are all considered top-rack dishwasher safe. However, always consult your specific model’s instruction manual for confirmation, as variations can exist.
The heating plate and the cooker’s housing should never be placed in the dishwasher. These components contain electrical elements and can be damaged by the high heat and water pressure. Hand washing these parts with a damp cloth and mild detergent is recommended.
Avoid using abrasive cleaners or scouring pads, as they can scratch the non-stick coating of the inner pot. Gentle cleaning ensures longevity and maintains the cooker’s performance.

Advanced Features & Tips
Unlock your Aroma cooker’s full potential with the delay timer and one-touch programs, ensuring perfectly cooked rice with minimal effort and maximum convenience.
Using the Delay Timer Function
The delay timer feature on your Aroma 3-cup rice cooker allows for convenient, pre-programmed cooking, ensuring a hot, freshly cooked meal is ready when you are. To utilize this function, first, ensure the inner pot is properly positioned within the cooker. Add your measured rice and water according to the guidelines for your desired rice type – white, brown, or other grains.
Next, press the “Delay” button. The display will likely begin to flash, indicating it’s ready for programming. Use the “Hour” and “Minute” buttons to set the desired delay time – how many hours from the current time you want the cooking cycle to begin. Once the time is set, press the “Delay” button again to confirm. The cooker will automatically switch to “Cook” mode at the programmed time.
Important considerations: Do not use perishable ingredients when utilizing the delay timer. For optimal results, and to maintain food safety, it’s best suited for rice and water only. Always double-check the programmed time before leaving the cooker unattended.
One-Touch Cooking Programs Explained
Aroma 3-cup rice cookers often feature convenient one-touch cooking programs designed to simplify meal preparation beyond basic white rice. These pre-programmed settings automatically adjust cooking time and temperature for optimal results with different grains and dishes.
Typically, you’ll find programs for “White Rice,” “Brown Rice,” “Steam,” and sometimes “Oatmeal” or “Soup.” To use a program, simply select it by pressing the corresponding button. The cooker will then initiate the pre-set cooking cycle. For brown rice, the program extends the cooking time and adds more water for proper texture. The “Steam” function is ideal for vegetables or delicate proteins, utilizing the steam generated during rice cooking.
Remember to consult your specific model’s instruction manual for detailed explanations of each program and recommended water-to-rice ratios, as variations may exist between different Aroma 3-cup cooker versions.
Extending the Life of Your Rice Cooker
To ensure your Aroma 3-cup rice cooker provides years of reliable service, consistent care is essential. Avoid using abrasive cleaners or scouring pads, as these can damage the non-stick coating of the inner pot. Instead, opt for a soft sponge or cloth and mild dish soap.
Regularly inspect the steam vent for blockages and clean it as needed to maintain proper pressure regulation. Always unplug the cooker before cleaning and ensure all parts are completely dry before reassembling. Proper cord storage prevents damage – avoid wrapping it tightly around the unit.
Furthermore, avoid dropping the inner pot, as this can cause dents or warping. With mindful use and diligent maintenance, your Aroma rice cooker will remain a kitchen staple for many meals to come.

Safety Precautions
Always prioritize safety when operating your Aroma cooker; never immerse the base in water, and exercise caution around hot surfaces to prevent injury.
Electrical Safety Guidelines
To ensure safe operation of your Aroma 3-Cup Rice Cooker, adhere to these crucial electrical guidelines. Always verify the voltage of your outlet matches the cooker’s specified voltage – typically 120V in North America – to prevent damage. Never operate the appliance with a damaged cord or plug; if either is compromised, discontinue use immediately and contact Aroma customer support for assistance or repair options.
Avoid using extension cords whenever possible. If an extension cord is absolutely necessary, ensure it’s appropriately rated for the cooker’s wattage to prevent overheating and potential fire hazards. Do not pull or yank the cord; always grasp the plug when disconnecting. Keep the cord away from hot surfaces and sharp edges. Never attempt to disassemble or repair the cooker yourself; this could lead to electrical shock or malfunction.
Ensure the cooker is properly grounded. Avoid operating the appliance in damp or wet environments. Regularly inspect the power cord for any signs of wear and tear.
Avoiding Burns and Scalds
Your Aroma 3-Cup Rice Cooker utilizes steam and heated surfaces; therefore, prioritizing safety from burns and scalds is paramount. Exercise extreme caution when opening the lid after cooking, as a significant amount of hot steam will be released. Direct the lid away from your face and hands to avoid direct contact with the steam.
The inner pot and exterior of the cooker become very hot during operation. Always use oven mitts or pot holders when handling the inner pot, lid, or cooker body. Avoid touching any heated surfaces directly. Allow the cooker to cool completely before cleaning or storing.
Be mindful of the hot rice itself; use a non-metallic utensil to fluff or serve the rice. Keep children away from the cooker during and immediately after operation. Never leave the cooker unattended while in use.
Proper Cord Storage
Maintaining the longevity of your Aroma 3-Cup Rice Cooker includes careful cord management. Avoid sharply bending or kinking the power cord, as this can damage the internal wiring over time. When storing the cooker, do not wrap the cord tightly around the appliance itself.
Instead, loosely coil the cord and secure it with a reusable cable tie or Velcro strap. Store the cooker in a cool, dry place, away from direct sunlight and extreme temperatures. Ensure the cord is not pinched or trapped when placing the cooker in a cabinet or on a countertop.
Regularly inspect the cord for any signs of damage, such as fraying or exposed wires. If damage is detected, discontinue use immediately and contact Aroma customer support for assistance. A damaged cord poses an electrical hazard;
Leave a Reply
You must be logged in to post a comment.