Bushnell Game Camera Manual: A Comprehensive Guide
Unfortunately, due to temporary server limitations, accessing detailed information is currently unavailable. Please revisit this manual later for comprehensive guidance.
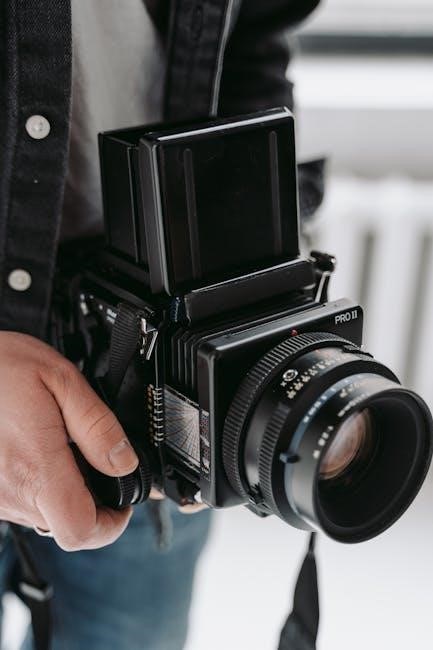
Welcome to the world of wildlife observation with Bushnell game cameras! These innovative devices empower you to remotely monitor animal activity, offering invaluable insights into their behavior and patterns. Bushnell has established itself as a leading manufacturer, renowned for producing durable, reliable, and feature-rich cameras suitable for both novice and experienced users.
This manual serves as your comprehensive guide to unlocking the full potential of your Bushnell game camera. We’ll cover everything from initial setup and configuration to advanced features and troubleshooting. Understanding the core functionalities will allow you to capture stunning images and videos, providing a window into the hidden lives of wildlife in your area. Due to current resource limitations, detailed specifics are temporarily unavailable, but we aim to provide a solid foundation for your journey.
Understanding the Benefits of Using a Game Camera
Employing a Bushnell game camera unlocks a wealth of advantages for wildlife enthusiasts, hunters, and property owners alike. These cameras provide a non-intrusive method for observing animal behavior, identifying species present, and monitoring population trends without disturbing the natural environment.
For hunters, game cameras are invaluable for scouting locations, determining peak activity times, and assessing trophy potential. Property owners can utilize them to monitor for trespassers or assess wildlife damage. Beyond practical applications, game cameras offer the sheer enjoyment of capturing stunning images and videos of animals in their natural habitat. However, due to temporary resource constraints, accessing detailed benefit specifics is currently limited. We encourage patience as we restore full functionality.
Camera Setup and Initial Configuration
Due to current resource limitations, initial setup instructions are temporarily unavailable. Please check back shortly for detailed guidance on configuring your Bushnell camera.
Installing Batteries and SD Card
Currently, due to website resource constraints, specific battery and SD card installation details are inaccessible. However, generally, Bushnell game cameras utilize AA batteries; the quantity varies by model, so consult your specific camera’s documentation. Ensure correct polarity when inserting batteries.
Regarding the SD card, locate the SD card slot – typically found under a protected door. Insert the SD card until it clicks into place. Important: Always power off the camera before inserting or removing either batteries or the SD card to prevent data corruption or damage to the device. Further detailed instructions will be available once resource limitations are resolved.
Choosing the Right SD Card (Capacity & Speed)
Presently, due to ongoing website limitations, detailed SD card specifications are temporarily unavailable. However, for optimal performance with Bushnell game cameras, consider an SD card with a capacity between 32GB and 64GB. Larger capacities may work, but compatibility isn’t always guaranteed.
Crucially, the SD card’s speed class is vital. A Class 10 or UHS-I U3 card is highly recommended to ensure smooth video recording and rapid image capture. Slower cards can cause delays or corrupted files. Always purchase SD cards from reputable brands to guarantee reliability and data integrity. Detailed compatibility charts will be accessible once the resource issues are resolved.
Understanding Camera Modes: Photo, Video, Hybrid
Currently, due to temporary resource constraints, in-depth mode descriptions are limited. However, your Bushnell game camera offers three primary operational modes: Photo, Video, and Hybrid. Photo mode captures still images whenever motion is detected, ideal for identifying animals. Video mode records moving subjects, providing dynamic footage of wildlife activity.
Hybrid mode intelligently combines both photo and video capabilities, capturing a still image and recording a short video clip simultaneously. This offers comprehensive documentation. Mode selection is typically found within the camera’s menu system. Further details regarding specific settings within each mode will be available once website resources are restored.
Navigating the Bushnell Game Camera Interface
Access to the interface guide is temporarily unavailable due to resource limitations. Please check back soon for detailed instructions on menu navigation and controls.
Menu System Overview
The Bushnell game camera menu system, while varying slightly between models, generally follows a logical structure designed for intuitive navigation. Upon accessing the menu – typically via a dedicated ‘Menu’ button – users encounter a series of options presented on the display screen. These options are usually organized into categories such as Image Settings, Video Settings, Date/Time, and System Settings.
Navigating through these menus is commonly achieved using the Up/Down arrow buttons to highlight desired options, and the ‘OK’ or ‘Select’ button to confirm your choice. A ‘Back’ or ‘Cancel’ button allows you to return to previous menus. Understanding this fundamental structure is crucial for customizing your camera’s settings to suit your specific monitoring needs. Due to current resource constraints, detailed model-specific menu maps are temporarily unavailable, but further information will be provided as soon as possible.
Button Functions and Controls
Bushnell game cameras typically feature a streamlined button layout for ease of operation in the field. The ‘Power’ button, unsurprisingly, controls the camera’s on/off state. The ‘Menu’ button grants access to the camera’s settings, allowing for customization of various parameters. ‘Up,’ ‘Down,’ ‘Left,’ and ‘Right’ arrow buttons facilitate navigation within the menu system and review of captured images or videos.
An ‘OK’ or ‘Select’ button confirms selections made within the menu. A dedicated ‘Play/Stop’ button initiates playback of recorded media. Due to temporary resource limitations, a comprehensive button layout diagram for each model isn’t currently available. However, these core functions remain consistent across most Bushnell cameras, enabling efficient control and operation.
Display Screen Information & Indicators
The Bushnell game camera’s display screen provides crucial information regarding camera status and settings. Key indicators include battery level, displayed as a percentage or icon; SD card presence and remaining capacity, vital for uninterrupted recording. A date/time display ensures accurate timestamping of captured content. Current camera mode – Photo, Video, or Hybrid – is clearly indicated.
Signal strength, representing the cellular connectivity (on cellular models), is also shown. Due to temporary resource constraints, detailed screen visuals aren’t accessible now. However, understanding these core indicators allows for quick assessment of camera functionality and ensures optimal performance in the field. Pay attention to warning symbols, signaling potential issues.

Image and Video Settings
Currently, accessing specific image and video configuration details is restricted due to temporary resource limitations. Please check back shortly.
Image Resolution and Quality Settings
Due to ongoing resource constraints, detailed information regarding image resolution and quality settings is temporarily unavailable. Bushnell game cameras typically offer a range of resolution options, impacting both image clarity and file size. Higher resolutions, like 20MP or greater, capture more detail, ideal for zooming and identifying subjects, but consume more SD card space.
Quality settings often allow you to choose between Super Fine, Fine, and Normal compression levels. Super Fine preserves the most detail, while Normal offers the smallest file size. Experimenting with these settings is crucial to balance image quality with storage capacity. Remember to consider the intended use of your images – quick scouting shots may not require the highest resolution.
Please revisit this section later for specific guidance on optimizing these settings for your Bushnell camera model.
Video Resolution and Length Options
Currently, due to temporary resource limitations, specific details on video resolution and length options are inaccessible. Bushnell game cameras generally provide several video resolution choices, commonly including 720p, 1080p, and sometimes even 4K. Higher resolutions deliver sharper, more detailed videos, but significantly increase file sizes and SD card usage.
Video length options typically range from short clips (5-10 seconds) to longer recordings (60 seconds or more). Shorter clips conserve storage space and are useful for capturing quick movements, while longer recordings are better for observing animal behavior. Consider the power consumption implications of longer video lengths.
Please check back later for detailed instructions tailored to your specific Bushnell camera model.
Adjusting Date, Time, and Location Settings
Regrettably, due to current server constraints, precise instructions for adjusting date, time, and location settings are temporarily unavailable. Accurate date and time stamping are crucial for organizing and analyzing your game camera footage. Most Bushnell cameras allow you to set these parameters directly through the menu system, often requiring navigation using the control buttons.
Some models may offer GPS functionality or the ability to manually input location data. Correct location settings are helpful for mapping animal activity and identifying specific areas of interest. Ensure the settings are accurate before deploying the camera for optimal data collection.
Please revisit this section later for detailed, model-specific guidance.
Detection and Trigger Settings
Currently, due to resource limitations, detailed detection and trigger setting information is inaccessible. Please check back shortly for comprehensive guidance on optimizing camera responsiveness.
Sensitivity Adjustment (High, Medium, Low)
Due to current resource constraints, specific sensitivity adjustment details are temporarily unavailable. However, understanding sensitivity is crucial for optimal game camera performance. Generally, ‘High’ sensitivity maximizes detection range, potentially triggering more frequently – including from smaller animals or moving vegetation. This setting is ideal for areas with low animal density or when capturing every possible movement is paramount. ‘Medium’ offers a balanced approach, reducing false triggers while maintaining a respectable detection range.
‘Low’ sensitivity minimizes false alarms, best suited for environments with abundant movement like windy conditions or heavily traveled areas. It prioritizes capturing larger animals, reducing unnecessary images or videos. Experimentation is key; start with ‘Medium’ and adjust based on your specific environment and desired results. Remember to periodically review captured footage to fine-tune the sensitivity setting for optimal performance and battery life.
Detection Range and Angle
Currently, detailed specifications regarding detection range and angle are limited due to temporary resource restrictions. However, understanding these factors is vital for effective wildlife monitoring. Detection range refers to the maximum distance at which the camera can reliably detect motion, typically ranging from 55 to 80 feet, depending on the model and environmental conditions. The detection angle, usually between 45 and 50 degrees, defines the width of the area the camera monitors.
Wider angles capture more of the surrounding environment, while narrower angles focus on a specific path. Optimal placement considers both range and angle; ensure the target area falls within the camera’s field of view. Factors like vegetation, terrain, and lighting can influence effective range. Regularly check captured images to verify coverage and adjust camera positioning accordingly.
Trigger Speed Explained
Due to current resource limitations, in-depth trigger speed analysis is temporarily unavailable. However, trigger speed – the time it takes for the camera to capture an image or video after detecting motion – is crucial for capturing clear photos of moving wildlife. Bushnell cameras generally boast trigger speeds between 0.2 and 0.7 seconds. Faster trigger speeds minimize the chance of missing fast-moving animals.
Several factors influence effective trigger speed, including camera mode, battery life, and SD card write speed. Hybrid mode often has a slightly slower trigger speed than photo mode. Regularly testing and adjusting settings based on observed results is recommended. Prioritize cameras with consistently fast trigger speeds for optimal wildlife documentation.
Advanced Features and Settings
Regrettably, advanced feature details are presently inaccessible due to resource constraints. Please check back shortly for comprehensive information regarding time-lapse and multi-shot options.
Time-Lapse Photography
Bushnell game cameras offer a fantastic time-lapse photography feature, allowing you to condense extended periods into shorter, viewable sequences. This is incredibly useful for observing changes in wildlife activity, plant growth, or even weather patterns over days or weeks. To activate time-lapse mode, navigate through the camera’s menu system – typically found under the ‘advanced settings’ or ‘special features’ section.
You’ll then be prompted to set the interval, which determines how frequently the camera captures an image. Intervals can range from seconds to hours, depending on the desired compression of time. Shorter intervals create faster-paced sequences, while longer intervals capture changes over extended durations. Remember to consider battery life when selecting an interval; frequent image capture consumes more power. The camera will automatically capture images at the specified interval, creating a series of photos that can be reviewed later on a computer.
Multi-Shot Mode (Burst Mode)
Bushnell game cameras frequently include a multi-shot, or burst mode, designed to capture a rapid sequence of images when motion is detected. This feature is invaluable for capturing moving subjects clearly, especially fast-moving animals. Instead of taking a single photo, the camera will take several in quick succession, increasing the chances of getting a sharp, detailed image of the action.
To enable burst mode, access the camera’s settings menu and locate the ‘multi-shot’ or ‘burst’ option. You’ll typically be able to select the number of shots taken per trigger – commonly ranging from 1 to 6 images. Be mindful that using burst mode significantly increases battery consumption and SD card storage usage, as multiple images are saved with each detection. Reviewing the captured sequences can reveal detailed animal behavior and movement patterns.
Interval Recording Options
Bushnell game cameras offer interval recording, a powerful feature for monitoring an area over extended periods without relying solely on motion detection. This mode instructs the camera to capture images or videos at pre-defined, consistent time intervals, regardless of activity. This is particularly useful for documenting changes in vegetation, weather patterns, or subtle animal movements that might not trigger the motion sensor.
Access the camera’s menu to configure interval settings. You’ll typically set the recording interval – for example, every 1 minute, 5 minutes, or 30 minutes – and the duration for which the interval recording should run. Consider battery life and SD card capacity when choosing intervals; shorter intervals consume more resources. Interval recording provides a continuous visual record, complementing motion-triggered events.
Mounting and Placement Strategies
Optimal placement and secure mounting are crucial for effective wildlife monitoring. Prioritize locations with clear views and protection against theft or damage.
Optimal Camera Placement for Wildlife
Successful wildlife observation with your Bushnell game camera hinges on strategic placement. Consider animal travel routes – look for trails, game paths, and areas near food and water sources. Positioning the camera facing north or south minimizes direct sunlight exposure, reducing glare and improving image quality throughout the day.
Elevate the camera slightly, around 3-5 feet, to capture a broader field of view and avoid obstructions like tall grass or snow. Angle the camera downwards for optimal coverage of the target area. Avoid placing the camera directly facing open fields, as this can result in washed-out images due to bright sunlight.
Observe the area beforehand to identify frequently visited spots by wildlife. Remember to clear any vegetation that might trigger false alarms caused by wind or movement. Finally, ensure the camera is securely mounted to prevent it from being disturbed by animals or the elements.
Securing Your Camera Against Theft
Protecting your investment is crucial when deploying a Bushnell game camera. Utilize a robust mounting system and a security cable, ideally a Python cable lock, wrapped around a tree and through the camera’s mounting bracket. Consider a metal security box or case specifically designed for game cameras, offering a physical barrier against theft.
Position the camera in a discreet location, away from easily accessible trails or roads. Avoid advertising its presence; camouflage the camera and mounting hardware effectively. Register your camera’s serial number with Bushnell and consider marking it with a unique identifier.
Inform local authorities or landowners about the camera’s location, especially in areas prone to vandalism. Regularly check on the camera to ensure it remains secure and functional. A combination of these measures significantly reduces the risk of theft.
Camouflage and Concealment Techniques
Effective camouflage is paramount for natural wildlife observation with your Bushnell game camera. Utilize natural surroundings – leaves, branches, and vegetation – to blend the camera seamlessly into its environment. Consider a camouflage skin or wrap specifically designed for game cameras, matching the local foliage.
Avoid placing the camera in direct sunlight, which can create glare and reveal its presence. Angle the camera downwards slightly to minimize visibility from above. Clear any obstructing vegetation directly in front of the lens, but maintain surrounding cover.
Regularly inspect the camera’s camouflage, as seasonal changes can impact its effectiveness. A well-concealed camera captures more authentic wildlife behavior without human interference.
Troubleshooting Common Issues
Due to resource limitations, resolving camera problems is temporarily unavailable. Please check the official Bushnell support website for assistance and solutions later.
Camera Not Powering On
If your Bushnell game camera fails to power on, begin with the simplest checks. Firstly, ensure the batteries are correctly installed, observing proper polarity (+ and -). Even new batteries can be faulty, so testing with a known working set is advisable. Secondly, verify the battery level; low batteries are a frequent cause.
Next, inspect the battery compartment for any corrosion or debris that might impede contact. Clean it carefully if necessary. Also, confirm the SD card is properly inserted, as a faulty or improperly seated card can sometimes prevent the camera from booting.
Finally, if the issue persists, attempt a reset by removing all batteries and the SD card for several minutes before reinserting them. If these steps don’t resolve the problem, consult the official Bushnell support resources for further assistance, as it may indicate a hardware malfunction.
Poor Image Quality
Experiencing blurry or unclear images with your Bushnell game camera? Several factors contribute to poor image quality. First, ensure the camera lens is clean and free from smudges, dust, or obstructions. A simple wipe with a microfiber cloth can make a significant difference. Second, check the image resolution setting within the camera’s menu; lower resolutions yield lower quality images.
Next, consider the ambient lighting conditions. Low light levels naturally result in darker, grainier images. Utilizing the camera’s infrared flash (IR) can help, but ensure it’s not obstructed. Also, verify the camera isn’t pointed directly at a bright light source, which can cause glare.
Finally, the quality of the SD card impacts image storage and clarity. Use a high-speed, reputable brand SD card. If issues persist, experiment with different resolution and quality settings to find the optimal balance for your environment.
SD Card Errors and Solutions
Encountering “SD Card Error” messages with your Bushnell game camera is frustrating, but often solvable. First, ensure the SD card is compatible – check your camera’s manual for supported capacities and speed classes. Second, try reformatting the SD card within the camera itself (menu options usually provide this). This often resolves minor file system errors.
Next, test the SD card in another device (computer, card reader) to verify it’s functioning correctly. If the card isn’t recognized elsewhere, it may be faulty and require replacement. Also, avoid removing the SD card while the camera is actively writing data, as this can corrupt files.
Finally, if the error persists, try a different, known-good SD card. Regularly back up your images and videos to prevent data loss. A high-quality, properly formatted SD card is crucial for reliable operation.
Leave a Reply
You must be logged in to post a comment.